Just in time for Summer.
Make this USA wallhanging!
Finished size 16 x 21 inches
Free pattern and tutorial here.

You will need an
1/8th to a 1/4 yard of:
Red print
White solid
Blue polka dot
Cream polka dot
Pink and yellow fabric scraps for "USA" and star.
1/4th yard of stripe fabric for binding
Batting and backing fabric approximately 20 x 25 inches
Cut:
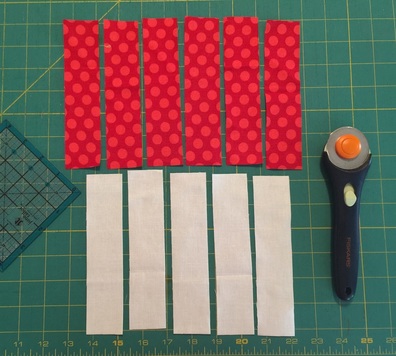
six-- 1 1/2 x 6 1/2 inch strips from red fabric
five -- 1 1/2 x 6 1/2 inch strips from white fabric
six-- 1 1/2 x 6 1/2 inch strips from red fabric
five -- 1 1/2 x 6 1/2 inch strips from white fabric
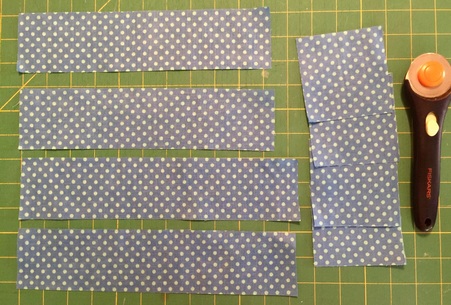
From blue dot fabric cut:
2 - 2 1/2 x 10 1/2 inch strips
2 - 2 1/2 x 11 1/2 inch strips
8 - 3 1/2 x 3 1/2 inch squares
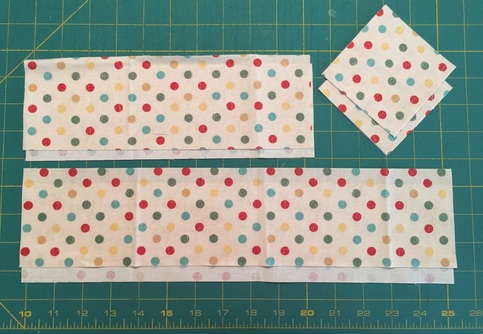
From cream dot cut:
2 - 3 1/2 x 10 1/2 inch strips
2 - 3 1/2 x 15 1/2 inch strips
4 - 3 1/2 x 3 1/2 inch squares
2 - 3 1/2 x 10 1/2 inch strips
2 - 3 1/2 x 15 1/2 inch strips
4 - 3 1/2 x 3 1/2 inch squares

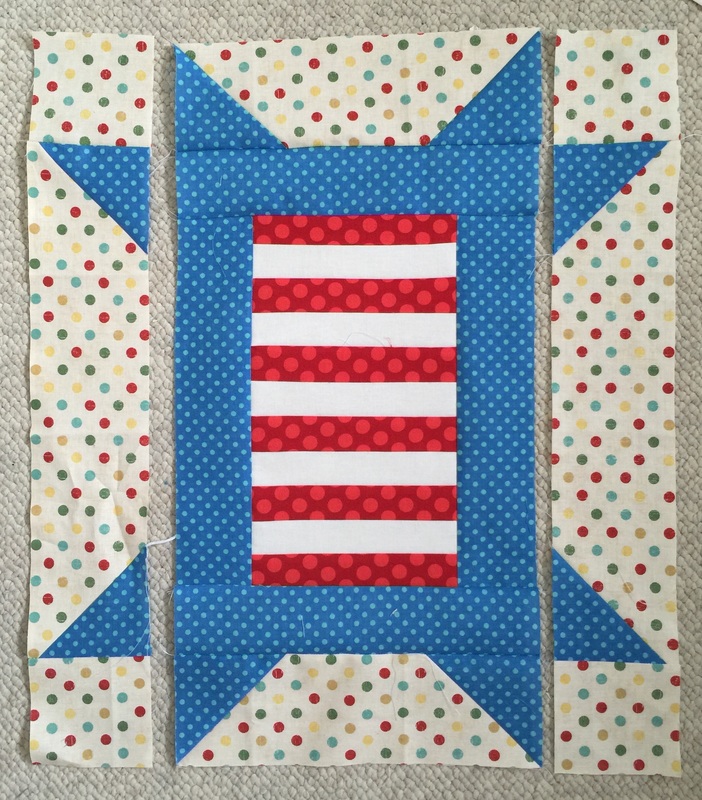
Join red and white strips together to form the inside of star block.
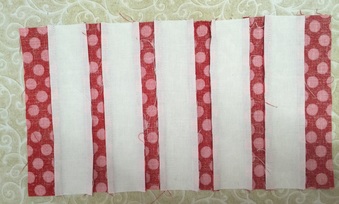
Press seems toward the darker fabric.
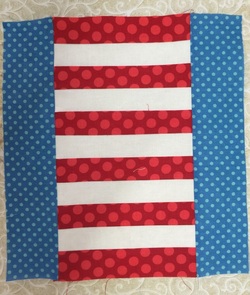
Add the 11 1/2 inch blue strips to the sides and press towards the blue fabric.
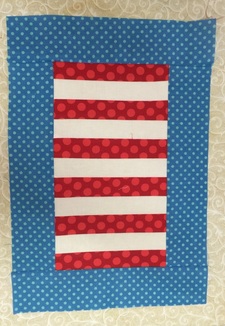
Add blue strips to the top and bottom and press.
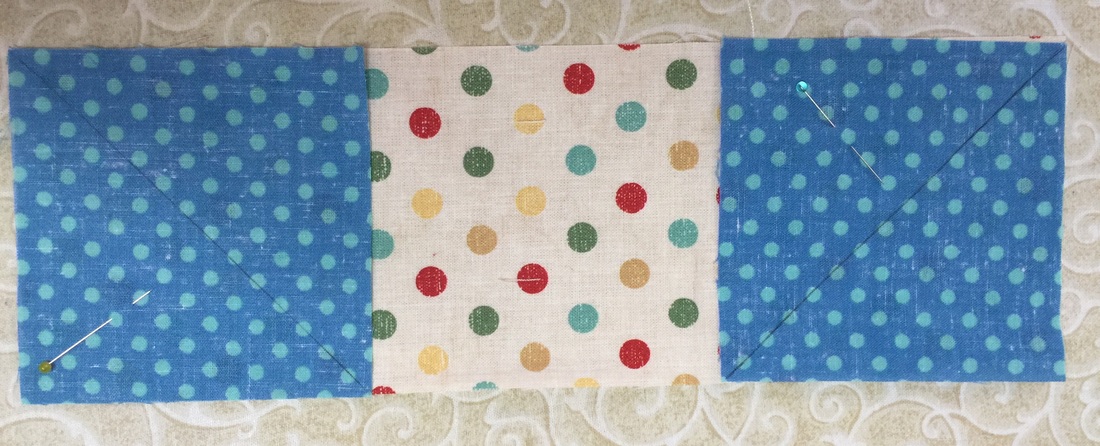
Draw a line from corner to corner of blue squares. Place 2 blue squares on cream polka dot fabric strips at each end. Stitch on line, flip and press. Do this to all four cream strips.
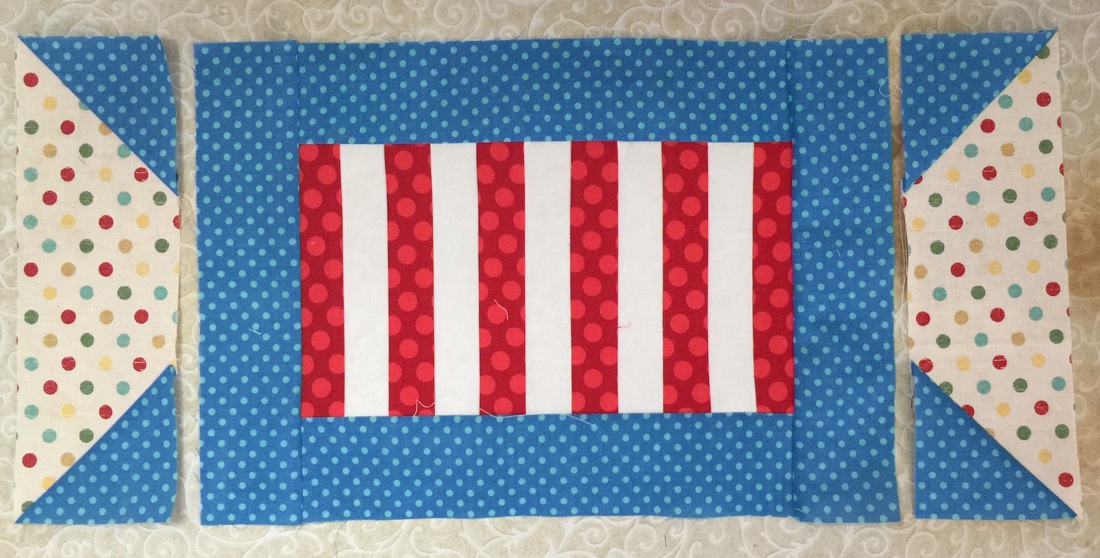
Add shorter cream strips with blue points to top and bottom of block.
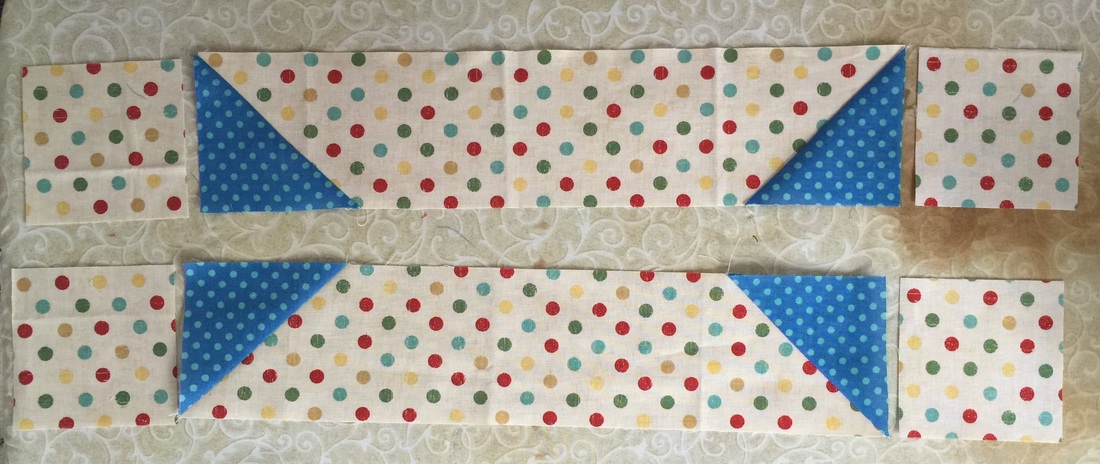
To the longer cream strips, add cream squares to each end.
Add these strips to the sides of the block.
Press in such a way that seams can "nestle" together where seams meet.
Trace star and USA letters to the paper backed fusible such as Steam a Seam. Cut out and fuse to block using the finished picture as a guide for placement. (Sorry, forgot to take picture!)
Print out pattern for star and letters here.
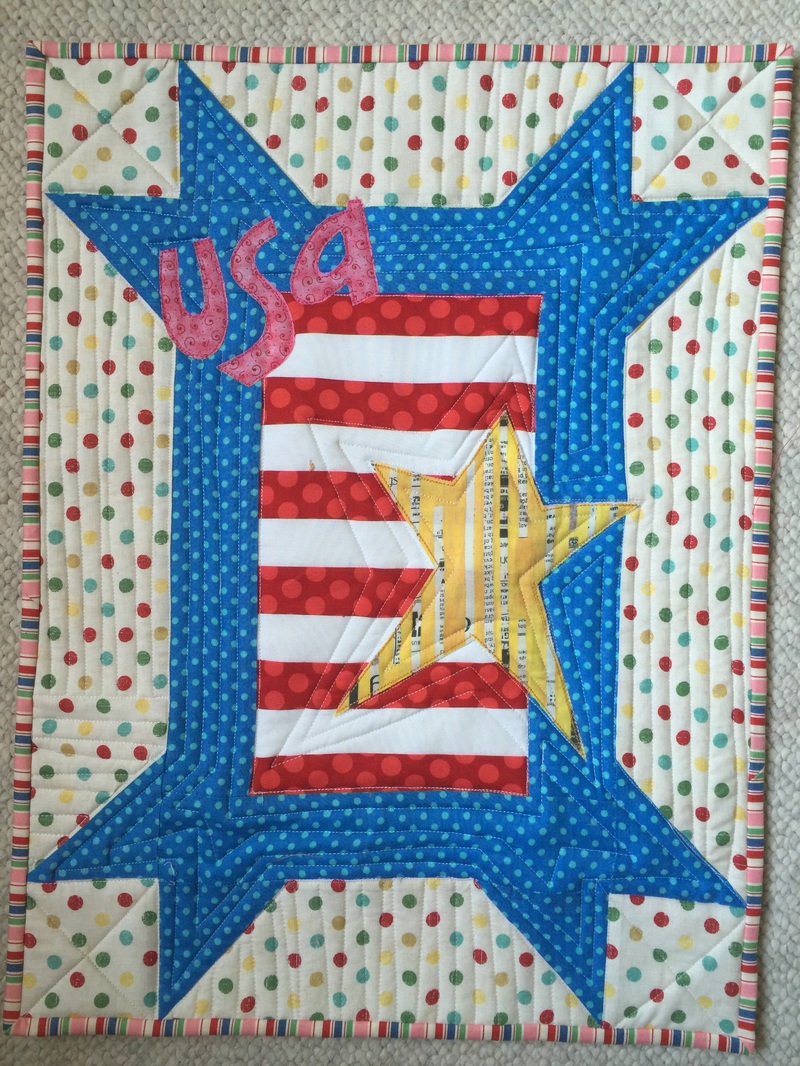
Though the star and letters are fused, to make them more secure, I used my single stitch applique method to secure the edges.
I layered the top, batting and backing and quilted mostly straight stitches with my domestic machine.
For the binding, I cut two strips 2 1/8 by width of fabric (WOF), joined them together. I then ironed the binding strip in half and attached in to the quilted piece with a 1/4 inch seam. I flipped the binding to the back and secured it with hand stitching.
I hope this tutorial was helpful and that you can now make a USA Wallhanging of your own!
Please feel free to share this with your quilting friends.
